Many homeowners are adopting composite decking boards in home construction, and it’s paying off. WPC decks are known to be safe, cost-effective, and sustainable alternatives to traditional wood decking.
Composite decking is an artificial product consisting of wood fibers and shredded/ recycled plastic. WPC decking manufacturers have designed these boards to resemble the striking beauty of wood.
KR WPC composite boards are made of quality recycled materials that are rot and slip-resistant. What makes it even better is its hidden fastening system making it easy to install, thus delivering a polished and clean finish.
When installing composite decking boards, it’s vital to follow the composite decking manufacturer’s instructions. When dealing with plastics, thermal expansion is always a factor of consideration.
When the temperature fluctuates, it can affect the WPC deck spacing during summer and winter. That’s because the length of the boards may grow and shrink as the weather heats or cools downs. But, this doesn’t happen with proper spacing as it allows movement without buckling.
Let’s discuss the easiest way to install composite decking; before that, here are some safety and preparatory procedures to follow.
1.Safety and Precaution
Like any other construction work, it’s vital to safely handle and prepare for installation, especially if it’s a DIY process. You will need protective tools like gloves, dust masks, protective clothes, and safety goggles.
After the suppliers of composite decking boards deliver your boards, leave them to adjust to your local temperatures before you start the installation. Also, avoid installing your WPC deck in cold weather.
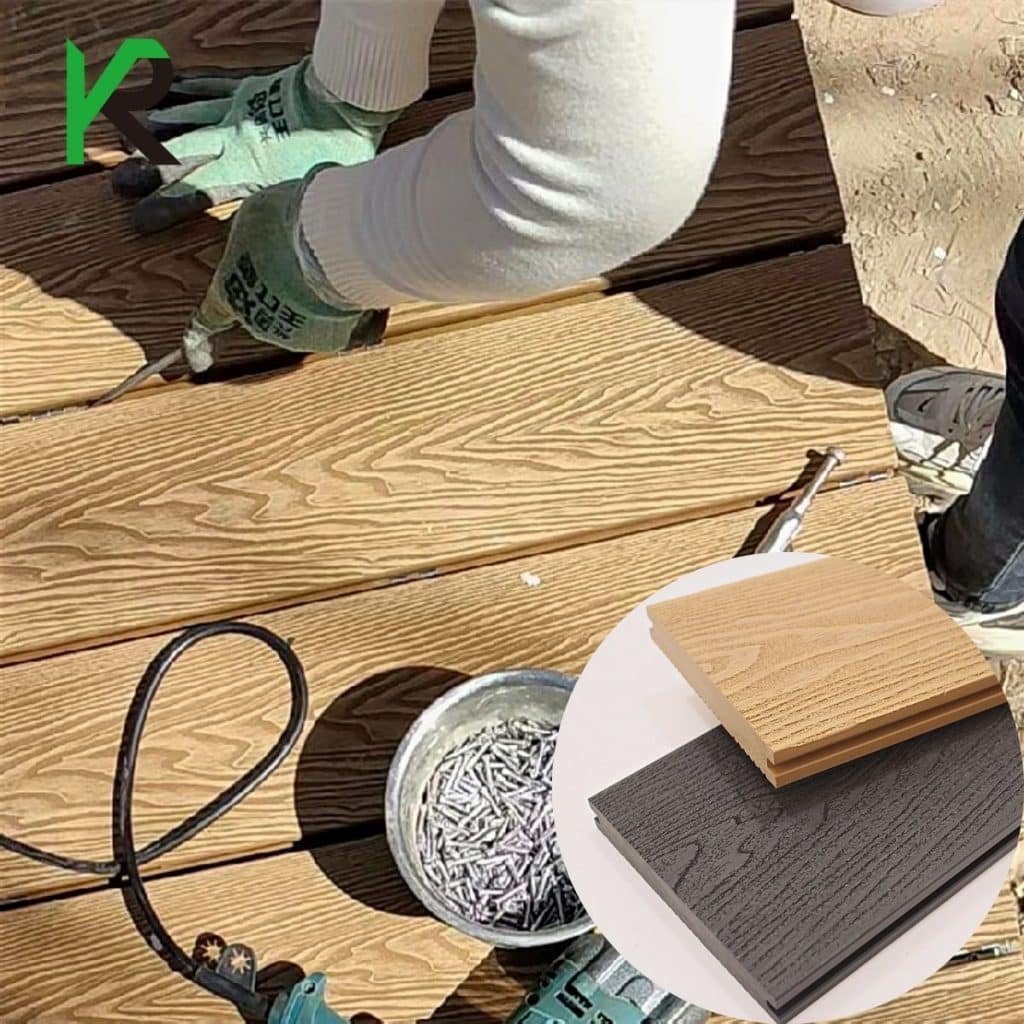
Without the help of professional experts, use standard woodworking tools. We recommend using a wood saw with a fine tooth blade to cut your WPC board to size. Also, to ensure the boards get proper support, we recommend using the reverse thread screws during face screwing of the composite decking board to eliminate mushrooming.
Mushrooming happens when the standard bulge head screw pulls some composite materials on the surface during installation. You can also use hammers to avoid raised bumps by leveling the surface.
2. Material and Location
These are two critical areas of consideration when you plan deck installation. If you want to buy a composite decking board, you must ensure that the wood plastic composite supplier has the material you need.
If you will build on a pre-existing patio, solid surface, or concrete foundation, you can build a decking frame on top of the low-lying installation area.
If you’re building on your roof terrace or balcony, the frame has to be raised away from the surface using a network of pedestals. This prevents damage to the roof’s waterproof membrane.
For those building on soft and uneven ground, first, cement a network of posts into the ground, then build your decking frame. This ensures that your composite decking tiles are solid and leveled while minimizing your frame’s elemental damage.
We believe this is the best advice you will get on installing composite decking boards on any ground.
How to Install WPC Decking Boards
Step 1: Build the frame
Step 2: Lay your first board
Step 3: Lay the remaining composite decking boards
Step 4: Install the final boards
Step 5: Finish
Step 1: Build the frame

- After taking measurements and preparing the ground for a composite deck, lay out your framework. Now, space the composite decking board joists apart. Use a standard residential space of 16 inches.
But any range between 12 and 24 inches apart works perfectly. A closer spacing means a sturdier frame. Besides, consider joists thickness. The thicker and stronger your joist is, the more secure your composite decking will be.
- Next, screw the joists together. If you’ll lay it on your patio or cement, then secure the weight of the completed job of framing to the ground. Also, you may use a screw to tighten the frame to the ground of the pedestal network.
- If the decking is longer than your joists, you’ll have to join the two sections to create a decking frame. If that’s not the case, you can assemble the internal joists directly. In addition, ensure there is a 10mm gap where the joists end to meet the crossbeams. This will allow for expansion if you’re cementing your post network to the ground, cement safely up to 500mm under the surface.
Step 2: Lay the first board
- Position hidden starter clips at regular intervals at the ends of your frame and on the frame’s joists. Your composite boards should be pushed into the clips. So, wherever the boards sit should be flush with the frame’s edge. Then, screw the starter clips into the frame.
- After positioning, push the first WPC deck for the starter clips to fit into the side groove. Push the boards until it becomes tightly secured.
- Then, at the joint where your first board meets the joists, the special clip’s toothed side into the other side from your hidden starter clips. Screw each special clip into the board and the joists of the frame through the drilled holes to fasten the composite decks. The screw holes should be in line with the center of the joists. Ensure each butt points has a fastener.
Step 3: Lay the remaining composite decking boards

To lay the remaining composite decking boards, place the exposed side grooves against the clips of the first board while applying some force. This ensures it connects securely. Place and screw the special clips on the edge of the board while sliding the WPC board into position. Do this until you remain with the last two boards awaiting installation. Lastly, ensure the cross-sectional gap between the boards is not less than 3mm for expansion purposes.
Step 4: Install the final boards
- The final boards are your last two boards. You must know the width and gap between each of these boards. Then mark the final joist where the last board’s edge will lie.
- Next, on the marked points, screw hidden starter clips at the end of the frame and at regular intervals on the frame’s joists. Now, push your final board against the starter clips until it clicks into place.
- Secure the final board on the frame using special clips into the joists and on the side facing your previous plastic composite board. Take the penultimate board, then push one of its lengths against the special clips of the final board until it’s properly secured.
- Lastly, slide the last special clips through the gap on another side of the penultimate board, between the 2ndand 3rd last boards, then position them at the joint center. Finally, screw it into place.
Step 5: Fascia finish
To finish your installation, use fascias to cover up the exposed frame to give your decking a sleek finish. Cut the fascia to sizes, then screw them on the frame ends are regular joists intervals.
The bottom line
Composite decking is anti-slip, rot-resistant, and a durable option to traditional wood decking. Its simple maintenance, sustainability, and easy installation make it popular for buildings.
With KR WPC decking boards, there are numerous decking colors, materials, and sizes to choose from. KR will send the installation instructions list or video to every customer for every product you purchase from the composite company and guide you through the project. For further inquiries, send us a quick quote to find out more.